YourPictureFrames.com Blog

YourPictureFrames.com Blog

800-780-0699

M-F 9am-5pm PST

  • Back to Our Store
  • About Your Picture Frames
  • News
  • Photography
  • Featured Artists
  • Tutorials
Home 2010 Archives for January 2010

Archives for January 2010

Flower Photography – Ways to Improve Your Flower Photos

January 29, 2010 By Alisha

If you love taking flower photographs but struggle with getting great flower photos, then here are some flower photo tips that can help.

1) Focus on the Detail

Always pay close attention to detail and look for slight imperfections in the flower or background. Look for tree branches, distracting backgrounds or anything that could take away from the flower. You also want to look for opportunities where you can have contrasting colors in your picture. This could be anything from having a yellow flower against a field of bright green grass or a blue sky.

2) Lighting is Key

Look for times of the day when there is great lighting with no harsh shadows or bright sunshine. The two best times of day for taking pictures are the hour after dawn and the hour before sunset. You can also get good lighting on overcast days when there is bright light with no direct sunlight. You should also be careful to avoid casting any shadows on the flower while taking your pictures. And if the flower is back lit, make sure to use a lens shade or a broad brimmed hat to prevent lens flare (light directly entering the lens).

3) Wind is Not Your Friend

Avoid breezy or windy days like the plague. Anytime you’re taking flower photographs, you need a still, calm day. The calmest time of day is at dawn so if you can’t shoot at that time, you may want to consider using a wind break. All it takes is the slightest breeze to move a flower which is one reason flower photography can be so tricky.  However, if the flower is moving slightly you can compensate for it by changing your camera setting which we’ll talk about next.

4) Check Your Camera Settings

Make sure you are using the right camera settings. Unfortunately, this is a common cause of bad flower photos. Depending upon how close of a picture you want, set your camera to either macro or portrait mode if you’re using an automatic. Or, if you’re using manual settings choose a wide aperture (small F Stop number) to sharpen the focus on the flower and blur the background.

5) Pretty Up Your Flower

Look for things on the flower that may not be noticed until the picture is enlarged. Look for small pieces of dirt, small insects (unless you want them in your picture) and ripped or damaged petals.  If the flower has any dust or aphids on it, brush off the flower with a soft brush (artist or make up brush). If there are any damaged or ragged petals look to see if the flower would look better without them. Normally if you have to remove more than one petal, it’s best to find another flower. And if you want to have a “dewy” look to your flower, try spraying the flower with a mist of water.

6) Know Your Angle

Anytime you’re photographing a flower, you want to get a unique angle that best displays the flower. This could involve shooting from above the flower or lying on the ground or some angle in between. But whatever vantage point you take, make sure you take time to consider how you want to compose your shot.  Just like any other type of photography, composition is always “king” when it comes to taking extraordinary pictures.

Have fun using these 6 flower photo tips and don’t forget to share your flower photographs with others by framing them for all to see!

Filed Under: Photography Tagged With: flower photography

Featured Photographer: Jason Lee

January 27, 2010 By Alisha

This week we’re featuring photographer and third generation photography business owner, Jason Lee. Jason is well recognized for his award winning wedding photography and his unique photo journalist style that captures the attention of brides everywhere. Jason has received a variety of photographic awards and recognition for his work as well as an impressive selection of thank you notes from clients over the last 17 years.

Jason works out of his third generation photography studio, Lee Photo, in Auburn, California and offers a wide range of photography services such as portraits, wedding photography and digital photo restoration.  Although Jason is most known for his wedding photography, he is passionate about photographing images that represent the images and emotions of people.  His experience is widely varied from working with families and models to shooting the photographs of  the award winning film, The Weight of It.

When I asked Jason what makes his photography stand out he said it comes down to the emotion and artistic expression that he tries to capture in every shot. He views photography as more than just taking a picture but being able to capture an expression and emotion that will help his clients treasure their memories for a lifetime. This is certainly the case as he recently received a note from a wedding client that he took over 11 years ago. The couple simply wrote him to thank him how much they still enjoyed their wedding photos eleven years later. It’s this type of impression that Jason leaves with his clients that is certainly a cut above the rest.

And for the sake of full disclosure, Jason is also my brother and part of the YourPictureFrames.com family. However, I can honestly say that even if he wasn’t my brother I would still be a big fan of his photography  😛

Filed Under: Featured Artists

Picture Frame Mats – How to Choose One

January 25, 2010 By Alisha

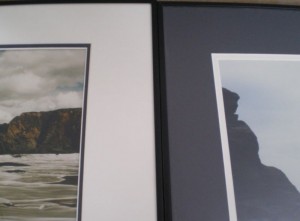
If you want an inexpensive way to make your photographs look even better, then you should consider using a picture frame mat. Picture frame mats are commonly used by professional artists and photographers to help make their artwork stand out. Just look at the difference a mat can make with the two images below (Landscape image courtesy of Jason Lee).

In addition to making your photographs look even better, picture frame mats can also help you save money if you have a unique sized picture to frame. Often times by using a picture frame mat, you can avoid the higher cost of having a custom frame made. All you have to do is find a ready made picture frame in a bigger size than the image you want to frame and then get a mat with an opening to fit your photo or artwork. If your artwork or photo is a standard size, you can get a pre- cut mat or if it’s a unique size you can have a mat cut.

Another great benefit of picture frame mats is that they can also help protect your picture or artwork. By using a mat it prevents the picture or artwork from coming in direct contact with the glass. This is important (especially in humid climates) because moisture can get trapped inside the frame between the glass and print and damage your picture.

How to Select a Picture Frame Mat

In order to select a mat there are three things to consider: the type of mat, the size and the mat thickness.

Type of Mat

Mats really come in a couple different types: archival and standard. Archival mats (also called rag mats) do not contain any acid, chemicals or wood based materials that can degrade your pictures or artwork. They are used for pictures or artwork that you want to protect like family heirlooms, special artwork or old family photos.  Archival mats are a bit more expensive but, if you’re trying to protect something special it is certainly worth a few dollars more.

The other type of mat is the standard mat which is made from paper or wood based products. These mats are commonly found in frames and are less expensive than archival mats. The problem with these mats is that they will deteriorate your artwork or pictures over time. However, if you have a picture that you can easily replace, then using an archival mat isn’t really necessary.

For most people, the best way to tell if a mat is an archival or standard mat is to ask. However in most cases you can assume a mat is a standard mat unless it’s specifically identified as archival.

Mat Size

The other thing to consider when choosing a picture frame mat is the size. When getting a picture frame mat you want to make sure that you have two sets of dimensions: the inner opening and the exterior size of the mat. It may seem silly, but often times people get so focused on the inside dimensions of the mat that they choose a mat that won’t fit in their frame. So make sure to understand that the the inner opening is the cut out space that displays your picture or artwork while the outside dimension is the size that must fit inside your frame.

Mat Thickness or Depth

Often times, people don’t realize that you can get mats in multiple thicknesses or depths. That means that you can stack up multiple mats in one frame to give your artwork added depth or color emphasis.  Multiple mats are often referred to as double mats, triple or sometimes even shadow mats.

Single mats are usually used just to add a little emphasis to a picture or to help protect it from touching the glass, while double mats are often used to bring out extra emphasis or depth.  You can find double mats that have two single mats placed right on top of each other or you can also find mats where they have spacers in between the two mats for a shadow look. The mat on the left is a single mat whereas the mat on the right is a shadow mat.

If you really want to give your pictures or artwork a super custom look, you can choose a double mat with two different colors. As you can see from this picture below, the two frames both have a double mat with two different colors.  This can really make the picture stand out and give you a way to highlight specific colors in your picture or artwork.

However, if you already have a frame selected for your picture or artwork, make sure that the frame can accommodate the extra depth of a mat. Most frames can accommodate a single mat, but if you put two mats inside the frame, often times the frame back won’t fit in most ready made frames. So, if you want to use a double mat or thicker, find out if your frame can hold the extra thickness by checking the depth of the rabbit (the inside depth of the frame).

Now that you now know more about picture frame mats, be sure to try one out the next time you want to frame a special picture. You’ll be glad you did!

Filed Under: Picture Frames Tagged With: mats

How to Take Great Sunset Photos

January 20, 2010 By Alisha

If you’ve always wanted to take amazing sunset photos, then here are three great tips that can help.  These are practical tips you can start using right away so you’ll be taking beautiful sunsets before you know it.

Tip #1: Never Look Directly at the Sun

This may seem like a rule you learned in kindergarten, but it’s important that you never look directly at the full sun or aim your camera at it. This can damage your camera’s image sensor and leave you with a very expensive repair. So, always wait until the sun is sinking below the horizon or wait until it is a dark red color.


Photo by Phil William


Tip #2:  Getting the True Color

With sunsets, it can often be tricky getting the true color of the sunset to come out in your photograph. Often times, that’s because the camera’s automatic white balance tones down the bright colors to make them appear more “normal.” So, here is what you need to do:

  • If you have a camera with a manual setting, you need to turn off the automatic white balance and then set it to the warm side.
  • If you have a camera with a color lens setting, or you have a SLR or DSLR, try using the red filter setting or attach one.
  • If you have a compact camera, then set your camera to the “sunset” mode. This will shift the color balance to the warmer side and help it use the best focus and exposure.
  • If your camera is none of the above, then use the “landscape” mode or “automatic” setting and use a photo editor to adjust the white balance manually.

Tip #3: Composition is Key

Really stunning sunset pictures require good composition, a lot of patience and a little luck. The most important of the three is most definitely composition. If you’re familiar with classical photography composition techniques like the “rule of thirds” then you want to put this knowledge into practice. If you’re new to photography, then here are a few tips for composing pictures (more late in a future post):

  • Look for distracting elements in the viewfinder or screen that could detract from the sunset. This could be a building in the way, power lines, tree branches, people – anything that takes away from the picture and looks out of place.
  • Identify the main focus of your sunset picture and have that take up 2/3 of the picture. For example if the main focus of your picture is the sky, then have the sky take up 2/3 of the frame of the picture.
  • Look for elements that add interest to your picture. This could be a silhouette of a palm tree, a person walking on the beach, a rocky outcropping to help frame the image or a reflection off the water.

In addition to these tips on composition, patience is always an important factor when taking pictures. Sometimes our initial response is to immediately start taking pictures, but sometimes sunsets actually get more beautiful as the sun drops. So, take some pictures at first, but be willing to wait a little bit for the truly outstanding picture. And the last thing, is to make sure you’re starting out with a good setting. Sometimes by changing your position or location it can be the difference between a nice picture and an extraordinary one. The best location for sunsets is often places over water like the beach or even places like the desert or prairie where the dust in the air can add some amazing color to the sunset.

Hopefully these three tips will help you take even better sunset pictures.

Thank you to Phil Williams for the use of his photo:

Phil Williams / CC BY-SA 2.0

Filed Under: Photography Tagged With: sunset photos

  • 1
  • 2
  • 3
  • Next Page »

Categories

  • Commentary (15)
  • Contests (1)
  • Crafts (1)
  • Easels (2)
  • Featured Artists (5)
  • News (99)
  • Photo Albums (1)
  • Photography (17)
  • Picture Frames (32)
  • Preservation (4)
  • Software (1)
  • Summary (66)
  • Tutorials (1)
  • Video (1)

Recent Posts

  • 7 Ways We Can Help Children Evolve
  • What Is Transitional Style And Why You’ll Love It
  • How To Stop Procrastinating After 50
  • Decorating a Small Home on a Budget
  • 10 BEAUTIFUL FALL IDEAS TO DO NOW

Archives

  • October 2021
  • September 2021
  • July 2021
  • May 2021
  • April 2021
  • March 2021
  • February 2021
  • January 2021
  • August 2017
  • July 2017
  • June 2017
  • May 2017
  • April 2017
  • February 2017
  • January 2017
  • November 2013
  • October 2013
  • August 2013
  • June 2012
  • April 2012
  • March 2012
  • February 2012
  • June 2011
  • May 2011
  • April 2011
  • July 2010
  • June 2010
  • May 2010
  • April 2010
  • March 2010
  • February 2010
  • January 2010

Customer Service

  • Contact Us
  • Frequently Asked Questions
  • Returns

Company Information

  • Out Story
  • Customer Feedback
  • Back to Our Store
  • In the Press
  • Articles

Join Our Frame Club

Sign up for sales and specials
  • Security Verified Seal
  • Yourpictureframes.com is a BBB Accredited Business. Click for the BBB Business Review of this General Merchandise - Retail in Auburn CA

Copyright © 2025 Your Picture Frames